|
| Brand Name: | SUNHOUSE |
| Payment Terms: | L/C, T/T |
The role and advantages of 50# ceiling system:
1.Covering and decorative role
Inside the house, air conditioning ducts, electric wire ducts, etc. usually go to the ceiling. Installing ceiling can cover and play a decorative role
2.Separation of space
Use the different design of the ceiling to distinguish the space location of the living room and dining room, and play a role as a partition between the two functional areas
3.Soundproof, heat insulation, waterproof function
Because the ceiling material has the characteristics of sound insulation, soundproof and waterproof, etc.: after the installation of the ceiling is equivalent to adding a layer of protection
| Accessory | Specification | Ratio | Package | |||||
| Height mm |
Width mm |
Thickness mm |
Length mm |
Weight kg |
Volume m3 |
|||
| 50# Card Bone |
30 | 18 | 0.7 | 3000 | 0.000756 | 1 square / 1 meter | 20pcs/tie | |
| 35 | 18 | 0.8 | 3000 | 0.000945 | 1 square / 1 meter | 20pcs/tie | ||
| 38 | 18 | 1 | 3000 | 0.001026 | 1 square / 1 meter | 20pcs/tie | ||
| 50# Sub keel |
17 | 50 | 0.4 | 3000 | 0.001275 | 1 square / 3 meter | 20pcs/tie | |
| 17 | 50 | 0.5 | 3000 | 0.001275 | 1 square / 3 meter | 20pcs/tie | ||
| 19 | 50 | 0.5 | 3000 | 0.001425 | 1 square / 3 meter | 20pcs/tie | ||
| 19 | 50 | 0.6 | 3000 | 0.001425 | 1 square / 3 meter | 20pcs/tie | ||
| Edge keel | 20 | 30 | 0.4 | 3000 | 0.0009 | 1 square/0.2pcs | 20pcs/tie | |
| 25 | 25 | 0.4 | 3000 | 0.0009375 | 1 square/0.2pcs | 20pcs/tie | ||
| Top burst | φ8 | 1 square/set | ||||||
| Spreader bar | 6,8,10,12 | 3000 | 1 square / 1 meter | |||||
| Nut | φ8 | 1 square/ 3 pcs | ||||||
| Self-tapping screws | 3.5*50 | 40 square/box | 20 boxes/case | |||||
| 3.5*35 | 40 square/box | 20 boxes/case | ||||||
| Spreader bar joint | φ8 | |||||||
| Putty powder | 20 | 10 square/pack | 1pack/20kg | |||||
| Gypsum adhesion powder | ||||||||
| Webbing | 46 | 50m | ||||||
| 46 | 75m | |||||||
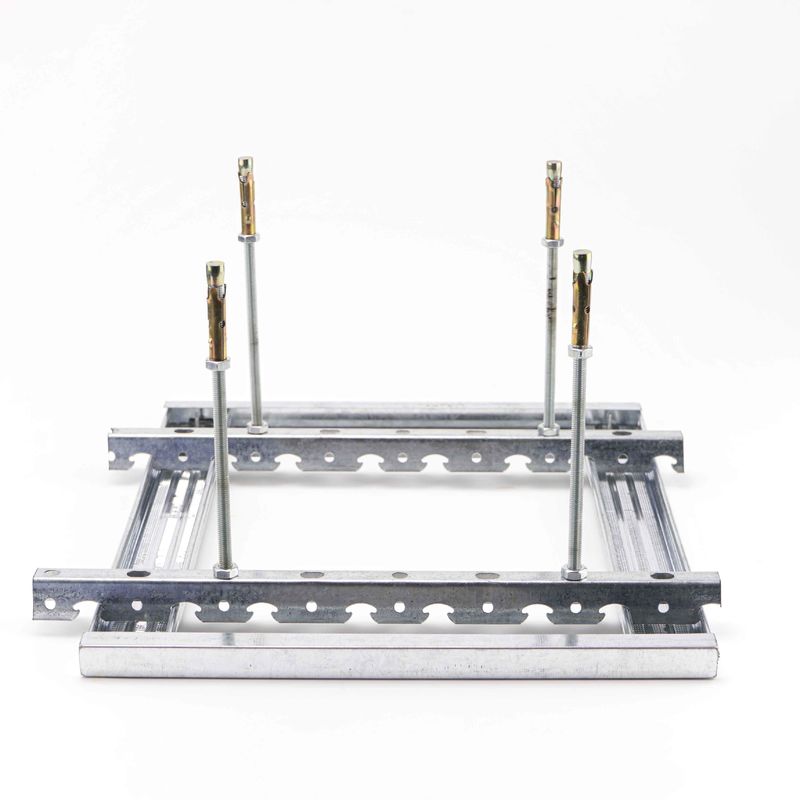
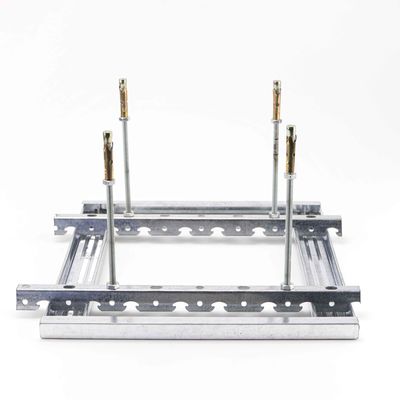
1.Main Runners: These are long, straight tracks that run parallel to each other and are typically suspended from the building structure.
2.Cross Tees: These are shorter tracks that run perpendicular to the main runners and provide support for the ceiling tiles.
3.Wall Angles: These are used to connect the grid system to the walls and provide additional stability.
4.Hangers: Hangers are used to suspend the main runners from the building structure.
5.Clips and Connectors: These are used to secure the cross tees and wall angles to the main runners and ensure a stable and secure connection.
6.Ceiling Grid Caps: These are used to cover the ends of the main runners and provide a finished look.
7.Suspension Wire: This is used to hang the main runners from the building structure.
It is important to choose components that are compatible with each other and suitable for the specific application to ensure a safe and effective installation. It is also important to ensure that the grid system is installed correctly to provide adequate support for the ceiling tiles and any other components, such as light fixtures and ventilation systems, that may be incorporated into the system.
These are just a few examples of the many applications for suspended ceilings. The specific use of a suspended ceiling will depend on the requirements of the specific space and the goals of the project.
1.Plan and Measure: Measure the ceiling area and plan the layout of the grid system, including the placement of main runners, cross tees, and wall angles.
2.Locate Studs and Joists: Determine the location of the building's structural supports, such as studs and joists, so that the hangers can be attached securely.
3.Install Main Runners: Suspend the main runners from the building structure using hangers and suspension wire. Ensure that the main runners are level and spaced evenly apart.
4.Install Cross Tees: Snap the cross tees into the main runners and secure them in place with clips or connectors.
5.Install Wall Angles: Attach the wall angles to the walls and the main runners to provide stability and support for the grid system.
6.Install Ceiling Grid Caps: Cover the exposed ends of the main runners with ceiling grid caps to provide a finished look.
7.Install Ceiling Tiles: Place the ceiling tiles into the grid system, making sure they are securely fastened in place.
![]()
 english
 français
 Deutsch
 Italiano
 Русский
 Español
 português
 Nederlandse
 ελληνικά
 日本語
日本語
 한국
한국
 العربية
 हिन्दी
 Türkçe
 indonesia
 tiếng Việt
 ไทย
ไทย
 বাংলা
বাংলা
 فارسی
فارسی
 polski

